Laser Trainer Pro

Introduction⌗
This is the second project I’ve published. It’s a sports application for practicing aim at home. Without a doubt, this project was much more challenging and interesting to develop than Flying Poo, the previous one I made. I published it in 2021 and it took me about two months to develop and publish.
Trailer:
Development⌗
Except for about five lines of code needed to make the camera work correctly on iOS, everything is programmed in Python using a cross-platform framework called Kivy. I chose this approach for two reasons: the first is to get more used to programming in Python, and the second is to avoid having to re-implement the same code for each platform.
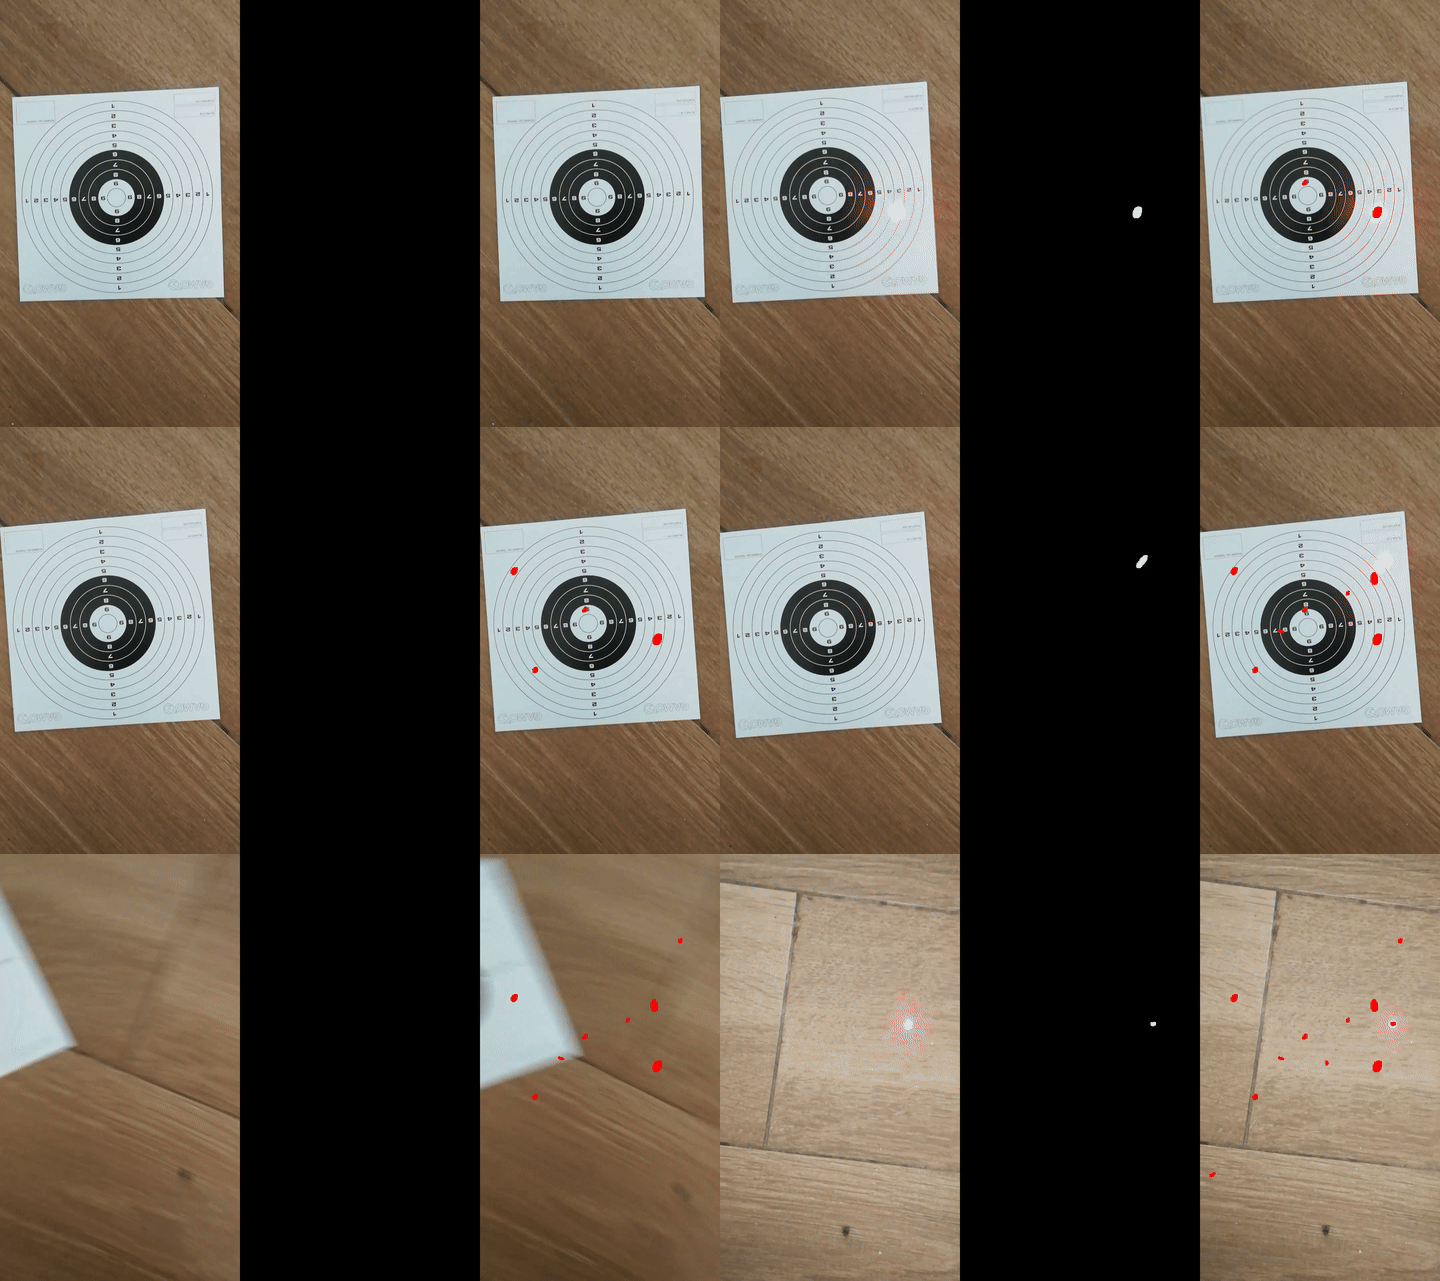
At first glance, the main challenge in creating this program is detecting the position of the laser. In fact, this was a pretty fun part. Initially, I thought using neural networks might be a good solution, but I ended up having a better idea. I first made a test recording showing different laser shots, and then used the OpenCV library (although I later had to switch to Numpy because there is no recipe that compiles it for iOS) to experiment with various ideas.
After many experiments and tests, I realized that a camera is literally a light sensor. So, filtering the pixels whose value is less than a specific threshold works very well.

Then it was just a matter of tweaking the parameters to improve the results. Although in some bright environments the laser barely stands out among the noise caused by ambient light, so I had to implement a function that detects if this is the case and alert the user. I decided to use only one of the RGB layers to save resources and discovered that the green channel detects the laser the cleanest (something I found interesting since the laser I used for testing is red). To calculate the score, I applied a mask to determine which ring the laser hit.
The Issues⌗
Then came the somewhat less entertaining part: turning it into a real application. This part is not very mysterious, and like most software development projects, it can be summarized in three steps: decide what the next step will be; google how to do X; find out why Z doesn’t work; and repeat. This method works as long as someone has had a similar problem before or there is some kind of documentation. Given Kivy’s small community, it’s to be expected that new, previously unsolved problems will arise, but when there is not even related documentation, this becomes a real issue.
When trying to migrate the code to iOS, it turned out that I could no longer access the camera buffer to manipulate the image. Since none of this is documented, my only option was to read Kivy’s source code, and it turns out that in Kivy’s implementation for iOS, the code I used to access the buffer was nonexistent, and I don’t have enough knowledge about iOS to implement it myself. As I read the code, I realized my options were dwindling, and I began to despair. Asking for help might not be an option, as no one has been able to capture the camera buffer on iOS… or maybe someone has? That’s when zbarcam comes in, a barcode and QR scanner.
Apparently, the developers of this package were the only ones who, using Kivy, have been able to access the camera buffer from iOS. To simplify the process and avoid modifying the source code directly, I opted to import it and use the magic of OOP to inherit the characteristics of any class and modify its functions at will.
Results⌗
Thanks to this project, I honed my Python skills and got my first taste of what research in the field of computing is like, and it turned out to be quite fun. That said, I’ve skipped many issues I faced in this summary, such as using Android and iOS APIs from Python to be able to print the target, or correcting the camera orientation on iOS by accessing the gyroscope API and measuring the tilt (because for some reason iOS rotates the image by default based on the phone’s orientation, and I couldn’t find any way to disable it with Kivy).
Here are the links to Google Play and the App Store if you are interested.